Re-visiting Travel Photos - (Sydney - August 2017 - Digital)
- Jack Hamilton

- Jul 24, 2020
- 3 min read
This weeks 'Re-visiting Travel Photos' post will be on photos taken in Sydney.
After coming back from my first trip to Japan, Caroline and I wanted to travel again as soon as possible. So we saved up some money and booked a one week trip to Sydney.
I had never been before, and neither had she, so it was great to travel without worrying about all the things you usually have to worry about when going overseas.
Even though it was a short trip, each day was filled with visiting all the attractions and taking in all that we could.
All the photos here were taken on the Canon 600D. I ended up shooting much more photos on the 35mm camera, but this is about the digital re-edits. You can check out the 35mm photos in the '35mm Photography' drop-down menu under 'Sydney.
I didn't have any original edits with these ones, so we'll just be breaking down the -re-edits.
For this edit, I ended up making a new preset which each photo has been applied with. I did, of course, adjust each photo accordingly in certain areas.
I knew from viewing these photos in Lightroom next to each other that I wanted to bring the blues up and make the photos overall brighter. I didn't want to put the grainy film effect on these photos as I wanted them to look clean.
The blues have been adjusted to be more aqua as you can tell. Along with that, I brought the whites and shadows up, while keeping the exposure leveled so it wasn't over or under.
After seeing the turn out with the Sydney Opera House, I wanted to bring the de-haze up so the photos have a strong finished look. It always brings the glass and certain other materials in buildings alive. Almost polished.
I also used the clone and heal tool a bit with cleaning up the skin as well as removing objects from the photo.
If you look at the photo of the Harbour Bridge with the boat in the bottom right corner. I managed to remove the post well enough that it doesn't disturb the water or the boat. It was quite difficult to replace the boat that was behind the post, to begin with, but I think the edit suffices.
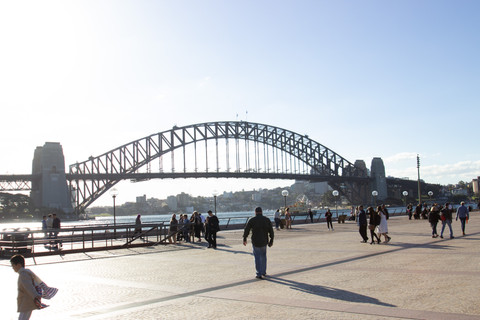
As always, I straightened and centered the photos, paying attention to what is in the background, just as much as the foreground. Looking at a picture and deciding what is more important, the subject or the setting is quite critical to editing. If it's the subject, then make it the center focus, if its the setting, then make sure it's being displayed adequately. In all and not cut off.
You can see I thought about this with the first photo. I knew that I, myself, was not the main focus here. Instead, it is the setting behind me. I was photographed centered in the original but the right side held no importance to the image, so I scaled in on the photo and shifted it out of frame, bringing the attention to the left of the frame.
As mentioned with the clone and heal tool, I used it to remove the post on the left, and clean up the skin.
Every other photo just had the basic edit done to them. Apply the preset I made for these photos and tweak a few areas. Nothing fancy.
That's pretty much it for this post, I hope you enjoyed it.
Check the photos out below and I'll catch you all next Friday at 12 pm. Until then, stay safe.
Thanks!


Comments